
The following describes all possible widgets installed on a wireframe website system. The home page settings are listed first and the child browser page settings can be found at the bottom of this page.
The key to editing content on the home page is to locate 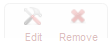 in the area that requires changes. If there are widgets listed below that you would like to include on your home page, please contact your Success Coach.
Edit Details
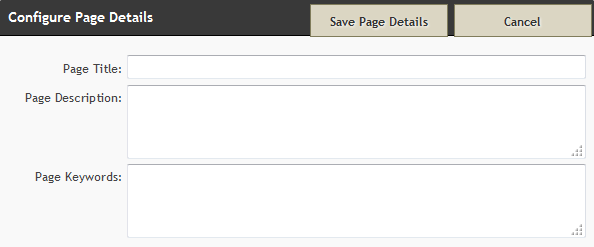
Click on the ‘Edit Details’ button at top right of the home page to enter the the page title, search description, and keywords. This feature will help with your home page’s search engine optimization or SEO. For more information and to find some helpful tips about SEO, visit the Search Engine Optimization page.
Slogan
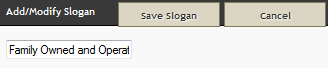
To change the wording of the slogan, above the main menu, click on ‘Edit’ at top left of the field. Once complete, click on ‘Save Slogan’.
Slider
To add or delete images used for the slider, click on the ‘Edit’ at top left of the slideshow. All images currently contained within the slider will be displayed.
- Click on the red X to delete an image
- Click on the pencil icon to edit an image.
- Use the crop box to crop your image and adjust the focal point.
Configure Slider: To replace an existing image, click on the Browse button to locate the file on your computer. Each image can also be linked to another page on your website or to an external website.
- To create a link to a page on your website, type in the page-to-be-linked’s file name (Edit Details > Optional Settings > What should be web page’s file name?).
- To link to an external website, be sure to add the http:// before the www.
If creating a link, select how the linked page should open: Current Window or New Window.
Once changes have been made, click on Save at top right.
Change Order of Slider Images: Place cursor over the image to be moved and drag and drop it to the new position. When any changes to the order of the images is made, click on ‘Save Order’ at the top of the window.
Edit Slider Options: By clicking on the dropdowns, choose either a Fade or Slide transition; choose the Slide Duration time. To show the slide, check the ‘Show Slide’ box. Once any changes are made, click on Save.
When all changes to the slider have been completed, click on Done at the top right of the window.

Navigation
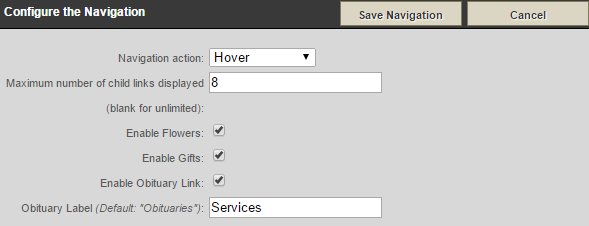
To modify the main menu settings, click on the ‘Edit’ button at top left of the menu. You have the ability to modify the action by choosing ‘No Dropdown’, ‘Click’ or ‘Hover’. You can choose how many sub-sections appear in the drop down menu by entering a number in the ‘Maximum number of child links’ field. You can also enable flowers and obituary links on the main menu by checking the applicable boxes. To change the name ‘Obituaries’ to something else, type the new name in the ‘Obituary Label’ field. Click on ‘Save Navigation’.
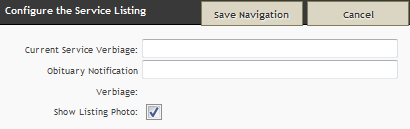
Service Listings
The wording for the service listings section can be modified / personalized. Click on the ‘Edit’ button at top left of the service area. To change the wording from ‘Current Services…’, enter new text in the ‘Current Service Verbiage’ field. to change the wording from ‘Obituary Notifications’, enter new text in the ‘Obituary Notification Verbiage’ field. There is also an option to show a photo for each current service; check the box beside ‘Show Listing Photo’. Click on ‘Save Navigation’.
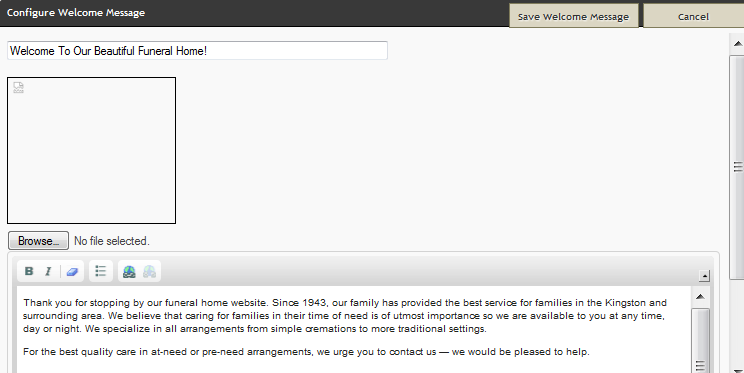
Welcome
Basic editing tools are provided to change the home page welcome message. The top field contains the wording for the welcome title. (ex. below ‘Why Choose Us?’). To change the image, click on Browse and locate the file on our computer. You will need to drag your cursor to highlight that focal point in the photo you want displayed. In the text field, type directly or paste content from another source. The formatting options available include: bold, italicize, erase formatting, bullets, and inserting a hyperlink.
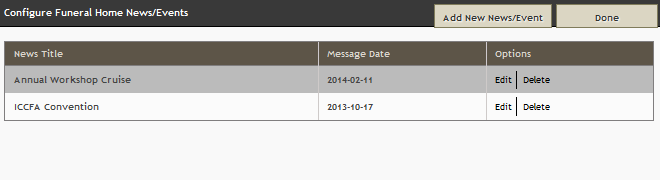
News & Events
Click on the ‘Edit’ button at top left of window and then click on ‘Add New News/Event’. Add a ‘Title’ and enter the ‘Message’ for particular news or upcoming event. Check the ‘Active’ button to ensure the listing is visible. (Once a listing is created and saved, the options to edit or delete are available.) Click on ‘Save’ and then ‘Done’.
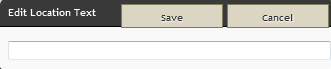
Locations & Directions
To change any of the contact information, navigate to your System Profile where the information is collected. To edit the introductory sentence only, click on ‘Edit’ at top left of window. If left blank, the default sentence will appear.
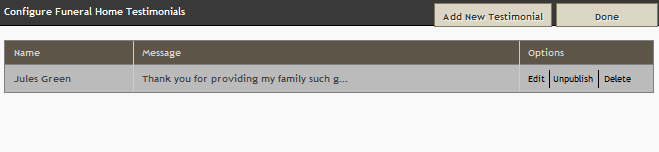
Testimonials
Click on ‘Edit’ at top left of window to open the Testimonials editing option. Click on ‘Add New Testimonial’ to enter the name and message. Check the ‘Published’ button at bottom to make testimonial visible. Click on the ‘Save’ button.
Local Weather
This widget can not be edited. It pulls location information from your System Profile.
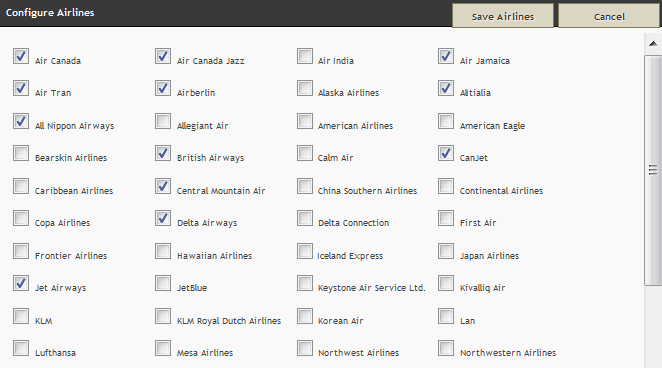
Local Airlines
This widget will provide helpful links to website visitors who require flight information. Click on ‘Edit’ at top left of window and then check all airlines that apply. Click on ‘Save Airlines’.
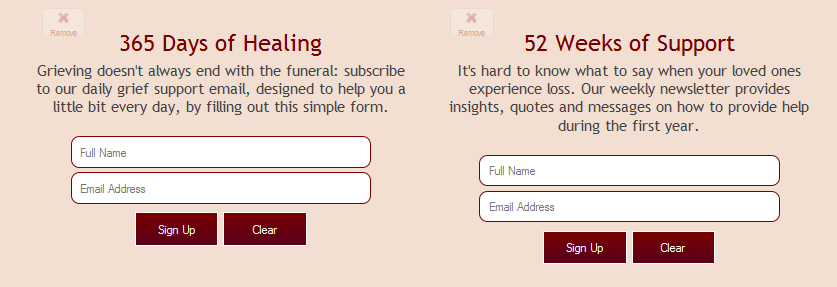
Grief Resources
The ’365 Days of Healing’ and ’52 Weeks of Support’ widgets can’t be edited. To remove either one, click on the ‘Remove’ option at top left of window. Once removed, there will be no way for you to bring it back. Please contact your Success Coach if you have removed (for billing purposes) or to add back into your website.
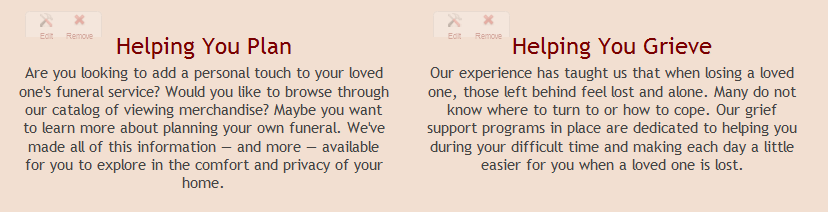
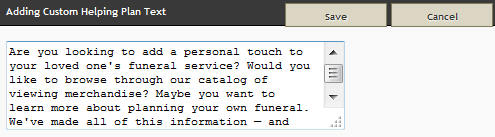
Helping You Plan & Helping You Grieve
Both fields can be customized with new content, however the titles will remain the same.

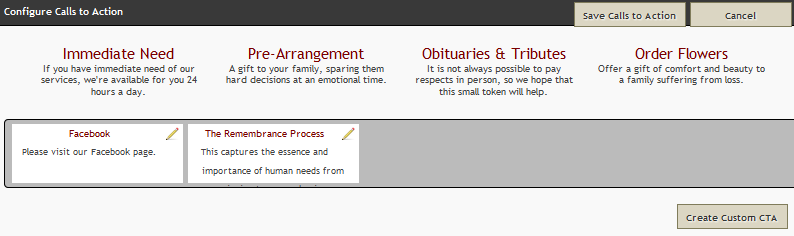
Calls to Action
There are four distinct calls to action available. Order Flowers, Immediate Need, Pre-Arrangement and Obituaries & Tributes. To change the order or add/delete any of the items, click on ‘Edit’ at top left of window. Drag and drop the items from lower bar to the top section and / or to rearrange the order. Click on ‘Save Calls to Action’. To create a custom call to action, click on the ‘Create Custom CTA’ at bottom right of window. Fill in all fields and then click on ‘Apply’ and then ‘Save Calls to Action’.
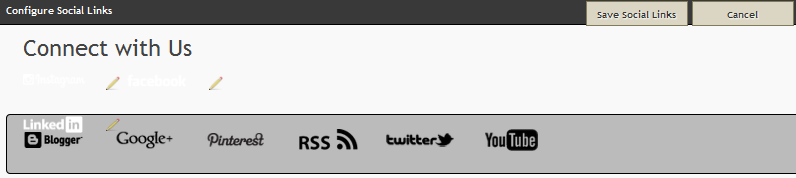
Social Media
To add links to social media, click on the ‘Edit’ button at top left of window and then drag and drop items from the lower to the top bar. A ‘pencil’ icon will appear beside each logo added. Click the pencil to add the URL to your social media account. Click ‘Apply’. Click on ‘Save Social Links’.
Associations
To add all applicable associations, click on ‘Edit’ at top left of menu. Drag and drop association logos from lower to top bar. (Please notify your Success Coach if there are additional affiliations to be included.) Click on ‘Save Associations’.

Need more help with this?
Don’t hesitate to contact us here.