
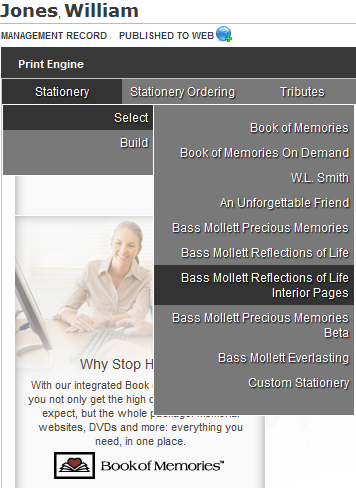
Navigate to the Main tab and open a record. Navigate to Print Engine > Stationery > Select > Bass-Mollett Precious Memories.
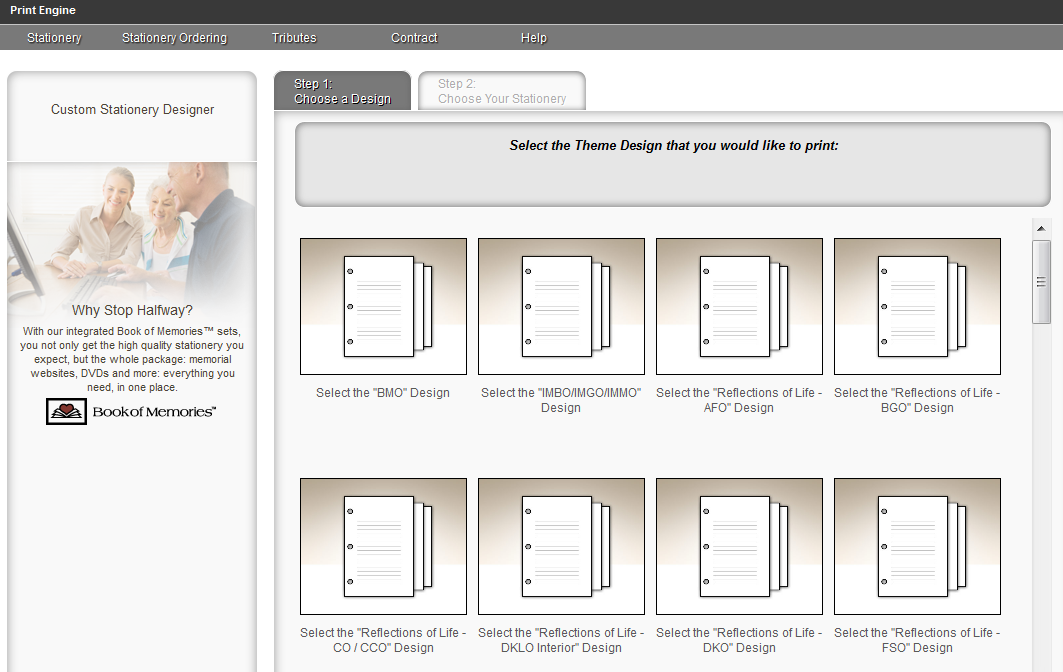
Choose a Design: Select the theme design to print.
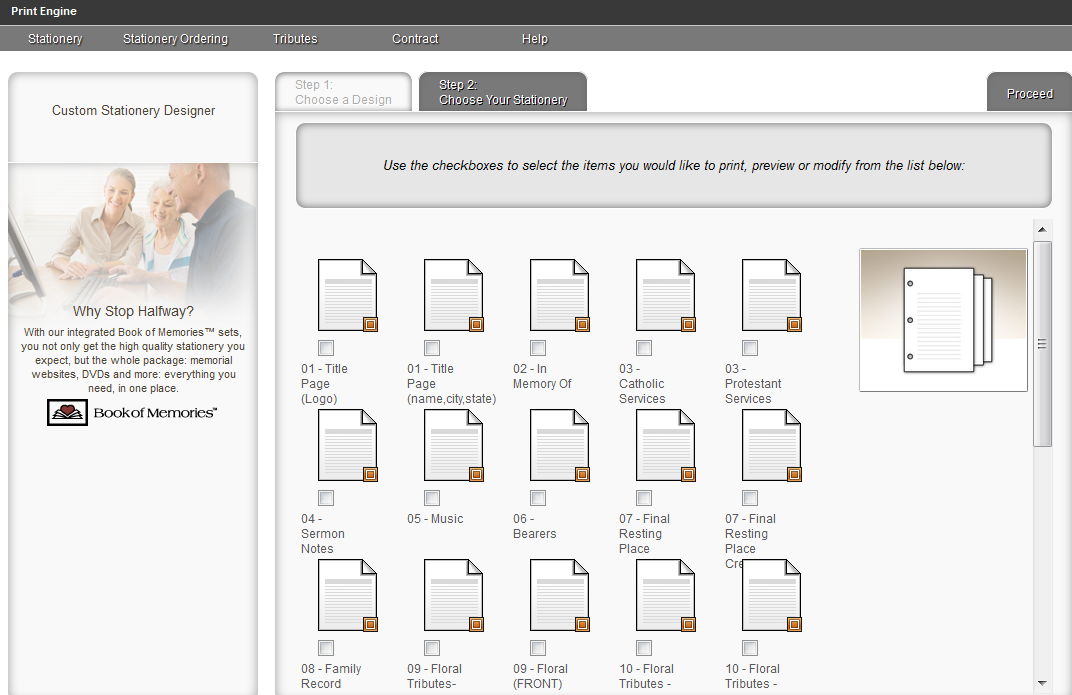
Check which items to print, preview, or modify. You may select multiple items > Click Proceed.
Choose to open in a new window to access full-screen canvas. All selected items will appear on the left. Click on the item to Print or Modify.
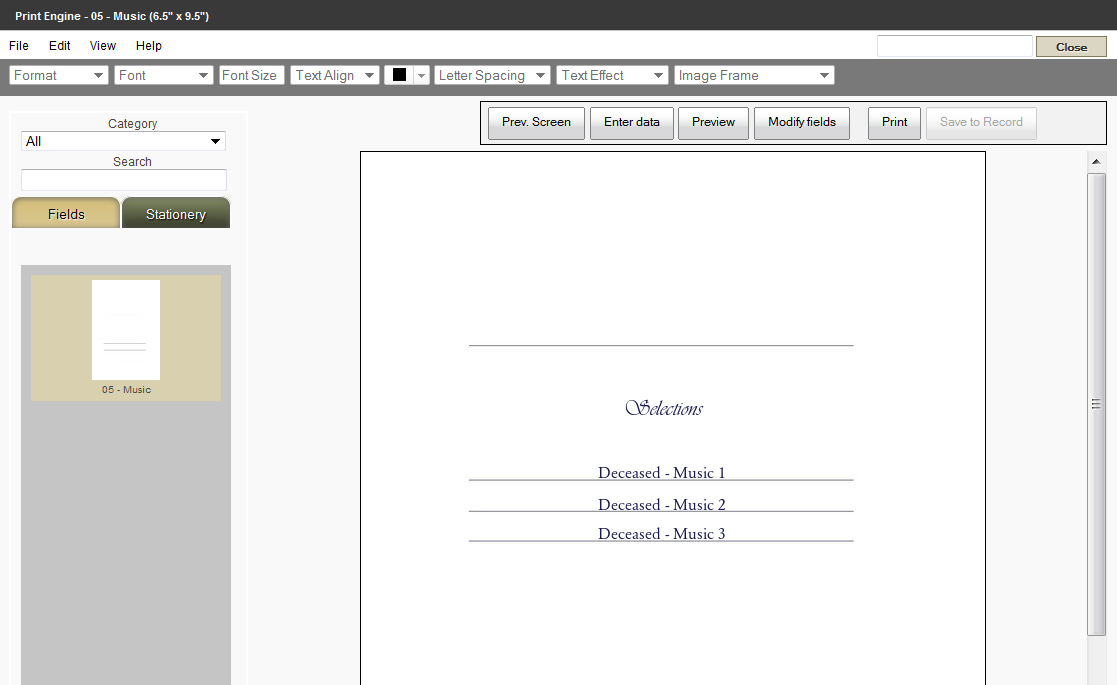
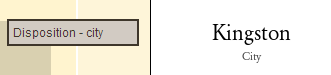
Mouse over fields to see where the information is pulling from in the record. When, for example, you mouse over ‘Kingston’, the information pulls from “Disposition – city” within the record.
If no further modifications are required, Print.
Modify a Field
- To modify or adjust a field > click Modify
- To move a field, click on the field and drag it to new location.
- To modify the Format, Font Style, Size, Alignment, Photo Frame, Color and Text Effect of the fields, click on the field and choose from the options.

Deceased’s Photo
To change the frame around the photo, click on the photo > Image Frame.
Add a New Field
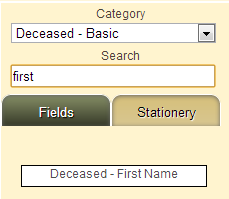
Click Fields and enter text in the Search Bar. Drag the field and place it on the stationery. The fields will automatically populate ONLY IF the information has been entered in the record. To help find a field in the Search Bar, choose a Category. Example below: Category > Deceased – Basic Information > first = “Deceased – First Name”.
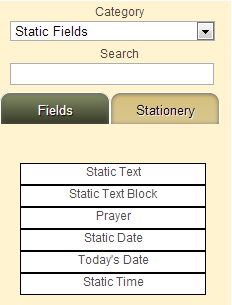
To add text that doesn’t pull from the record, click Fields. Change the Category to Static Fields: Choose ‘Static Text’ for one line of text; Choose ‘Static Text Block’ for a paragraph.
Drag the field to the Stationery. Right click on the field and click Edit. Enter a name (Label) and replace Static Text to the text of your choice. Preview changes at any time.
Enter Data
To change or modify data > Click Enter Data. Click the field to enter new information. Click on Save to Record. New fields can also be added in this section. (See instructions above). Preview changes at any time.
Add Prayer
Click on ‘Edit’ in top menu and choose ‘Add Prayer’ or right click on project and choose ‘Add Prayer’. Click on ‘Insert Prayer’ to browse the available prayers in each of the 3 categories: Religious, General Child. Choose one of the categories and then click on ‘Previous’ or ‘Next’ to view.

Click on ‘Insert’ and the prayer will load on the left. The text can be edited from that box. Once complete, click on ‘Save’. To modify the text, use the top menu: font, text size, color, etc. To change a prayer: Right click > Edit > Clear the Prayer (delete text) > Insert Prayer. Follow the steps above to add another prayer.
Add Image Element
Click on ‘Edit’ in top menu and choose ‘Add Image Element’. Click on ‘Select Image’ to browse from the Poems or Structural categories. Click on ‘Previous’ and ‘Next’ to view.


Click on ‘Insert’ and ‘Save’ to add to the stationery. The text is not editable but it can be re-positioned on the stationery by dragging and dropping. The field can be expanded or minimized by grabbing and dragging the corner boxes of the image element. Click on ‘Preview’ to ensure the layout and text is correct. Click on ‘Modify fields’ to return to editing screen. Click on ‘Print’ when ready.
Need more help with this?
Don’t hesitate to contact us here.