
Follow us
Choose & Place Images
The Choose & Place Images menu allows you to select images to be used in various widgets on your site. You can add images to your site from almost anywhere, including your existing site, Facebook account, computer, other sites on the internet, or our built-in stock image collection. This gives you access to a huge variety of image options to suit your site, so you can find exactly the right image to represent your business.
When selecting images to use on your site, by default the editor will use the quick picker.
Quick image Picker
The quick image picker is a simple way to choose images. You’ll be able to choose images from your folders or from images that we’ve already pulled into the platform.
We use “infinity scrolling”, so just scroll down to reveal more images on this window.
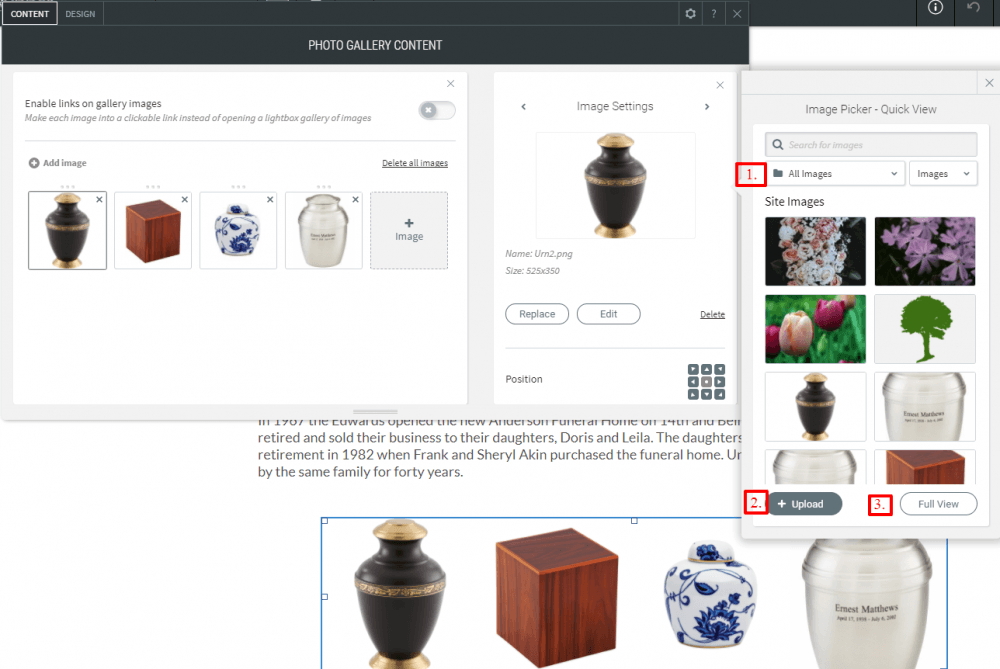
With the quick picker open, you can:
- Select the folder with images you want to use.
- Simply select an image to get more information about it. You can see the size, name and more on the right side after you’ve selected it.
- Press the “+” icon to upload your own image.
- Clicking the Upload Images button will prompt you to upload a new image from your computer.
- Switch to the Full View for more image choice options. The responsive editor automatically displays images from a number of different sources, including:
- The site you’re importing (if you’re importing a site)
- Free images from various sources (such as Unsplash)
- Related Facebook business page
- Uploaded images
Adding Images
To add an image, click on it to select it.
When selecting images for the Image Slider or Photo Gallery widgets, you can select multiple images at one time. As you do, each image will be surrounded by a colored border. When you click Done, all the selected images will be added to the widget.
Managing Images
You can organize and manage your images to make updating your site’s content more streamlined. With the image picker window opened, just click on Manage Images toggle to switch modes.

There are a huge amount of options available in this mode. See the screenshot below for a diagram, then read the text under to understand each option.
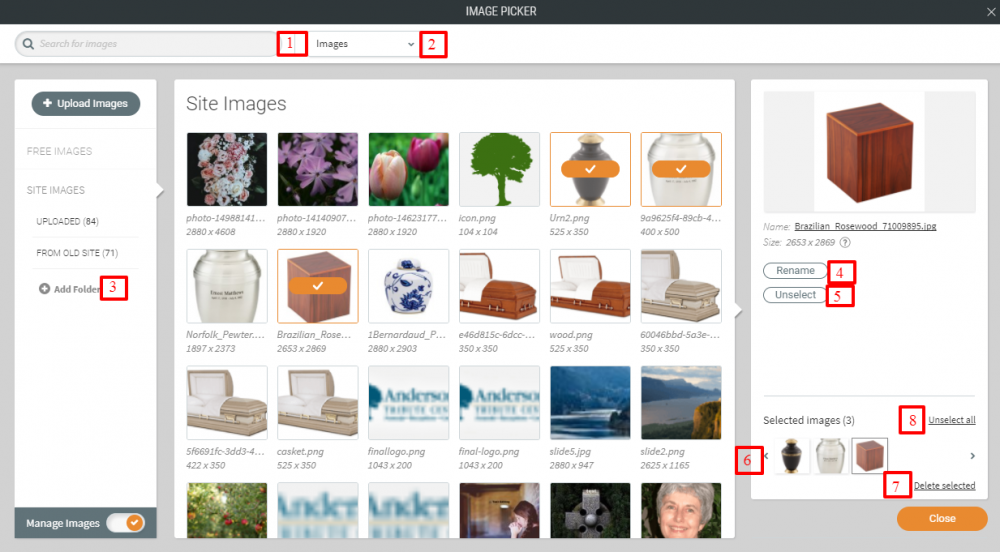
- Search all images – If you know the name of the image you’re looking for, you can run a text search for it
- Filter – Filter your images to narrow down the type of image you’re looking for
- Add folder – Add a new folder that you can group images under
- Rename – Rename a single image
- Unselect – Remove a single image from your selected images
- Selected images carousel – See the images you’ve selected here
- Delete selected – Delete these images and remove it from your image library or folder
- Unselect all images – Unselect any images that you have selected
Editing Images
Using the Photo Editor, you can make a great number of changes to an image, from applying filters to adding text or pasting on stickers. Quickly edit images on the fly within the Website Builder without having to rely on expensive third-party software.
Click on an image on your Website to open up the Content Editor.
Click the Edit button.

- When you edit an image with the Image Editor, it is saved under Site Images.
- Images do not replace previous images when making edits, they create new versions.
- Keep in mind that some widgets allow you to add additional modifications such as drop shadows, borders, and overlays. Please see the instructions related to the widget you are using for more details.