This feature allows you to add custom fields to your system and create a custom field title for form exporting. The user created fields can also be used on reports by using the Field Names generated by the system when the field is created. Your system administrator MAY have added additional fields. Please visit the link to show the field names available for user created pre-filled forms.
Introduction
There are two types of data entry fields.
The first type is fields that are pre-defined in the system and available to all funeral homes on the client and service data entry screens. You may control which of these fields appear on your data entry screens by default via Admin > Define Default Data Field Visibility on Client Screens which is found in the Data Field Maintenance section. Please see the help documentation for more information on showing/hiding pre-defined data fields.
The other type of field is funeral home created custom fields. The pre-defined fields are available to all funeral homes, but you may also have other information that you wish to collect that is not on the pre-defined list of fields. You may add these types of fields via the Custom Field Utility.
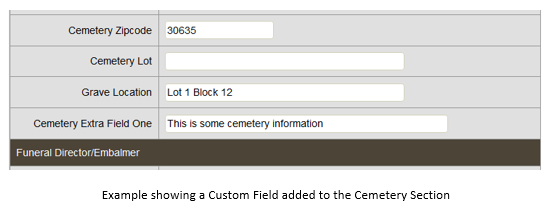
Accessing the Custom Field Utility
You may access the utility to setup and maintain your custom fields by logging in using and account that has Admin access and visiting the link “Custom Data Entry Field Maintenance” in the Data Field Maintenance section of Arranging Director Admin.
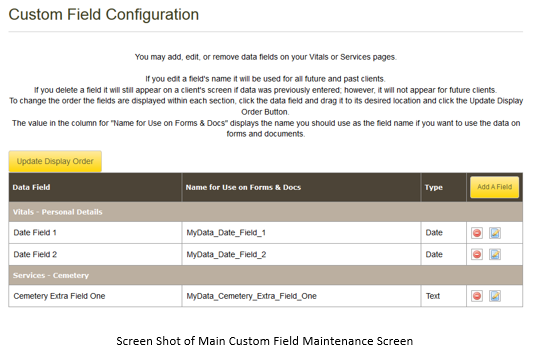
Adding Fields
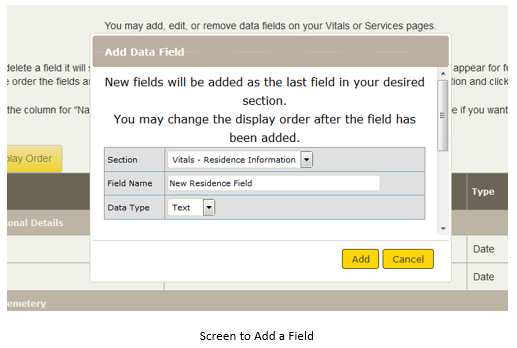
To add a custom data collection field, click the “Add a Field” button. You will specify which section on the vitals or service page the field should appear, the name of the field and the data type for the field. Custom fields must appear at the bottom of your chosen section but you do have the ability to set the display order of your fields.
In addition to the following list of fields available to all funeral homes, your funeral home may have some fields created by a system administrator which are available to only your funeral home.
View your funeral home specific fields.
Editing a Field
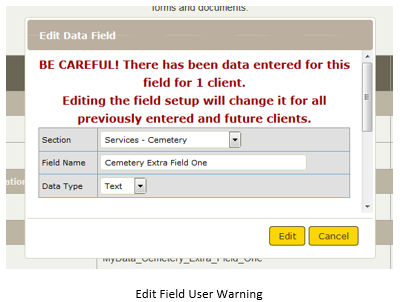
You may edit a field by clicking the edit icon. Be careful when editing field information if you have already entered data for the field. Editing the field will change the name, display section, and type for all past and future clients.
You will be presented with a warning if you choose to edit a field that has existing data.
Deleting/Deprecating a Field
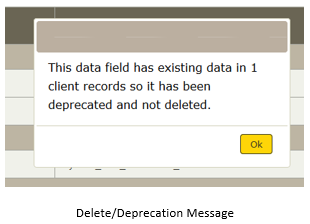
There are two possible actions that may occur if you choose to delete a field. The field will either be deprecated or deleted. You may delete/deprecate a field by clicking the delete icon. If data exists for a field, the field will be deprecated. This means that the field will no longer appear on your data entry screen UNLESS there is pre-existing data for the client for that field. If no data was ever entered for the field then the field is actually deleted.
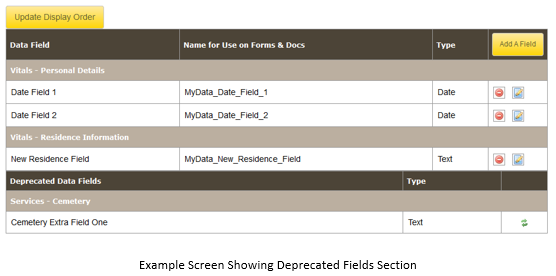
Deprecated fields will appear at the bottom of the list under the section title Deprecated Data Fields. If you ever wish to use the field again you can simply click the green “undeprecate” button and it will be available for use and appear on your data entry screen again.
Changing Display Order
You may only change the display order of fields within their defined section on the Vitals or Services data entry screens. Once you have added the fields, simply click anywhere in the field name’s row, hold down the mouse button and drag the field to the location you wish it to appear. Remember to click the Update Display Order at the top left of the screen! You do not have to click the Update Display Order button after each move. You may arrange your sort order and click the Update Display Order one time when you are finished setting the display order for all of your fields.
Using your Fields on Custom Forms and Documents
You have the ability to create your own custom PDFs and documents that can display client entered data. Please see the help information for Forms Management for full details regarding user created custom forms and documents.
You will notice that there is a column titled “Name for Use on Forms & Docs” in your field list. This name is automatically generated by the program and cannot be changed by you. This is the exact name you will use as the Name Property when you define your field on a PDF form. If you wish to use the field on a .rtf document remember to wrap the name with %% before and after the field name in the document.
A word of caution: if you modify a field’s name that has been used in a pdf or rtf document you will need to edit the document to use your new name.
Need more help with this?
Don’t hesitate to contact us here.
