
 The database section in your Pulse system was created to help reduce the amount of time it takes to create records and utilize the many additional features. We recommend that you designate a period of time to build the database; once the information is added, it can be easily accessed from various parts of the system. Enter the information once – and you won’t have to enter it again.
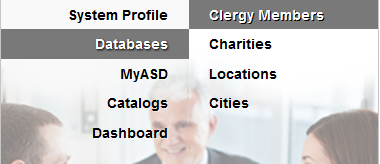
Navigate to System Settings > Databases.
The number of databases available depends on your system. All available options are listed below.
Clergy Members
- Select the ‘Add Clergy Member’ button at the top right.
- Enter the name of a clergy member and email address. Add the additional contact information if this is pertinent to your record keeping.
- Clergy Approves Receiving Anniversary Notifications – check the box if the clergy member approves.
- Anniversary Notification – once an email address is entered and the box is checked that indicates the clergy member has approved receiving email notifications. The clergy member will receive notice one week prior to the anniversary of death for any record that he/she is associated.
- Save
Charities
- Select the ‘Add Charity’ button at the top right.
- Visible (option to hide charity within the Book of Memories)
- Name of Charity
- Make Checks Payable To (only if different than name of charity)
- Charitable Registration Number (located on the charity’s website)
- Select where check should be mailed
- Complete the mailing address information only if the check will be sent to the charity.
- Add any additional contact information if this is pertinent to your record keeping: the information will not display within the Book of Memories.
- Save
Locations
- Select the ‘Add Location’ button at the top right.
- Add the street address, city, province/state and postal/zip in order to generate an accurate Google map.
- Test Map to confirm accuracy. If not accurate, locate the GPS coordinates of the location.
- GPS Co-ordinates (add only if address doesn’t display properly in Google Maps)
- Check the box if the location is inside city limits.
- Specify the type(s) of location. Check all that apply.
- Save
Cities
Most cities are already entered in the system. Only add a city when it is not visible as a selection when creating a record, form, or stationery.
Need more help with this?
Don’t hesitate to contact us here.