
In minutes, your firm can create stunning, moving memorial tributes to offer families. Once created, the video files can be burned to a DVD using a preferred program.
Open a record and navigate to Digital Video Tributes: Create New Project
The Project Options checkboxes will automatically be checked. 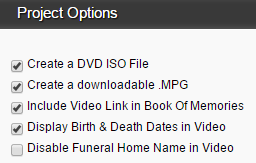
- Check either the ISO or .MPG program to burn the DVD.
- Leave ‘Include Video Link in Book of Memories’ checked to ensure the DVD link is visible in the Book of Memories.
- ‘Display Birth & Death Dates in Video’ – uncheck to eliminate the information from the video.
- ‘Disable Funeral Home Name in Video’ – check to remove the funeral home name from the end of the video.
- Create a name (ex. family name) for the video. If that information is entered in the record, the name, date of birth, and date of death will automatically display.
- Next
- Choose the intro for the video. Select the theme pack. By default, the chosen Book of Memories theme will be included in the dropdown.
- Preview Video to view an example of the theme.
- Next
- Choose photos for the video. All photos uploaded by the funeral home or shared by online visitors within the Book of Memories will be available. Choose specific pictures or click the Select All link. To add more photos, Upload Photo. Add Files (or Cancel Upload). Locate the photo(s) on your computer and open. The photo will load to the pop-up window. Start Upload. If more photos are uploaded, select all the pictures to add to the video.
- Next
- There are also videos available to use in the video (optional). Select the arrow icon to preview the video. To add a video, click the + icon. Once added, the name will appear on the right. To remove it, click the X icon.
- Next
- Choose music from the library or upload your own. (Note: The DVD program currently requires a music track to operate. Contact your Success Coach if you would prefer no music. There is a file available for upload that contains no sound.) Select the arrow icon to preview the song or click + to add the song. You may add multiple songs or the same song multiple times.
- Next
- In the video timeline, click a photo and drag it to the left or right to change the order of the photos.
DVT Editing Options

- Add/Edit Motion – Choose the transition. Click on a photo and select Add/Edit Motion. Choose from the different transition options in the pop-up window. The direction of the arrows indicates which way the photo will move. Select the transition and APPLY. If no transition is set, by default, the photo will fade in and out within the center of the slide.
- Edit Photo – UNDO at any time.
- Crop: Cut part of the photo. Click the Crop icon. Drag the box over the part of the photo to display. Click Apply Crop.
- Straighten: if crooked.
- Auto Contrast: Adjust contrast setting.
- Auto Brightness: Adjust brightness setting.
- Grayscale: Convert a photo to black and white.
- Rotate
- APPLY
- Add Text – Click on a photo and select Add Text. In the pop-up, click the area and add text in Text Line 1 and Text Line 2 (if required). Keep each line short to ensure the text fits on the slide. APPLY
- Delete Item – Click on a photo and choose delete.
- Next
Download a preview of the video
Render Low-Res Preview: The time needed to render the video will vary depending on the number of photos and videos included. The preview will automatically start playing.
Click BACK to modify any aspect of the DVD.
- To purchase additional credits, Buy More Credits. Choose the number of credits to purchase; the associated cost will appear below. Enter Billing Information and Proceed to Payments or Cancel Purchase.
- On the secure payment site, the information previously entered will be visible. Continue or modify if necessary.
- Enter the credit card information and then Submit to Card Issuer
- Available credits will display. Pay with Credits.
Once the payment process is complete, CREATE VIDEO
The video will render and a download link will become visible when the project is complete. Select OK.
For information on printing your case, insert and label, click here.
DVD Copy Protection
To copy protect your DVDs, FrontRunner uses Protect Software that secures your valuable videos effectively against illegal copies and sharing. Once your ISO file has been generated, open the video editor and go to step #4. Refer to the bottom section for Copy Protection.
First Time Users – Registration
If you are using this for the first time, you will need to Register. Enter your email address and create a password. Register. An email will be sent to you. Click the link within to confirm the registration.
A new tab will open when your email is successfully verified. You will be asked to download the ProtectBurn software. Follow the steps: Save – Open Downloads – Run – Install. You will need to reboot your computer following installation.
Buy Licenses
Right click over the icon in the icon tray at the bottom right of your computer monitor and click Buy Licenses. You will need to do this before you can copy protect your DVD.
- Choose a license option. Add to Cart. Next.
- Enter your email address and password. Next.
- Complete customer information. Next.
- Place Order.
- Complete the credit card information.
- Copy Protect Your File: Locate and open the DiscProtector Video program on your computer. (Some optional settings will open. The default source is where the ISO file can be found whenever uploading into the program. The default destination is where the copy protect version will be saved each time. If you do not choose any settings, you can save each time.) OK. Next.
- Enter your email address and password. Next.
- The File will be for the ISO file you have saved on your computer. Click the Browse button and locate the file. Double click on the file then Open. Next.
- You will need to choose where you want the protected copy to be saved on your computer. Click Browse and choose a folder you want it saved in. Also, give the file a name then click Save. Next.
- When process is finished, click Next. Finish.
- You may now upload the protected file in your DVD burning program to create the DVD.
Frequently Asked Questions
Question #1: Is there a way to adjust the speed of the video to allow more time for each photo?
Answer: There is no way to adjust the speed. We suggest 6 seconds per photo transition plus 1 minute combined for intro/exit videos. A 5 minute song, for example, would be good for 40 photos.
Question #2 What programs do you recommend for burning DVDs?
Answer: There are many options available to burn DVDs; some are free while others are available for download at a range of costs. We suggest that you take a look at the ratings and how each works to determine which program will work best for you. Of the various free options available, we can recommend CD-Burner-XP.
Question #3 I know I need the rights to the music but is it okay if I upload a song I’ve purchased through iTunes?
Answer: No. Purchasing music does not mean you have the rights to use it. The only exception is through such sites as www.royaltyfreemusic.com.
Need more help with this?
Don’t hesitate to contact us here.