
We have a new and improved Digital Video Tributes that is now available to clients. In minutes, your firm can create stunning, moving memorial tributes to offer families. Once created, the video files can be burned to a DVD using a preferred program.
To get started, you will need to open a record from your system.
Click Digital Video Tributes from left.
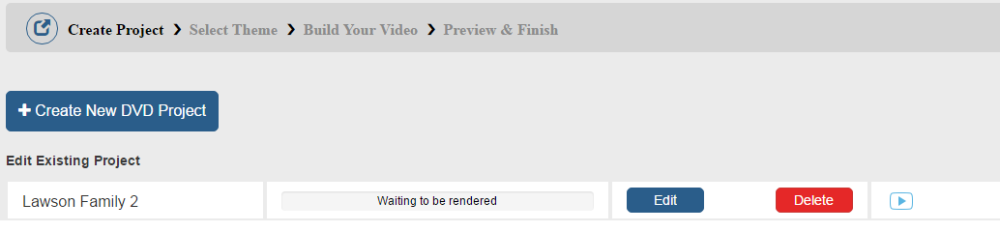
This is where all of your DVD projects will be accessible, should you wish to create more than one project.
Getting Started with Your Video
Click Create New DVD Project.
Enter a Project Name.
Choose a Theme
Select a theme you wish to use. A popup will appear with the theme selected.

A preview of your theme will be shown
Use the drop down to choose the style of transition between photos, and also the background display.
1. Standard: pictures will fade in and out.
2. Collage: pictures are dropped on a canvas. Example: pictures floating on top of water.
3. Sliding: pictures rotate on a carousel.
4. Movement: pictures will show with a faded view. The faded view slides over the picture to reveal it.
Use the arrows to flip through to other themes should you wish to change the theme.
If you would prefer there not be a theme, you can check the box for a black background. Please note, this only works if you use the Standard transition option in the drop-down.
Once you have chosen how the video will display, click Select Theme.
Build Your Video
Add Your Audio File
There are a couple different options for audio.
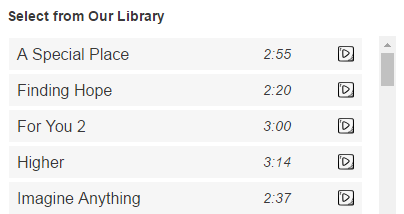
1. Click the link “click to add music” where you can choose from a library of songs. Click the play button beside a song to listen to it. Once you have selected a song to use, click Add Music. If you would like to add more songs, click Add Another Song and follow the same steps.
2. Click the link “click to add music” where you can upload your own audio file. Click Upload File > click Add File > Find the audio file on your computer > Open > click Start Upload. If you would like to add more songs, click Add Another Song and follow the same steps.
If there is no audio file selected, there will be no music with video.
Add Photos
Click Add Photos.
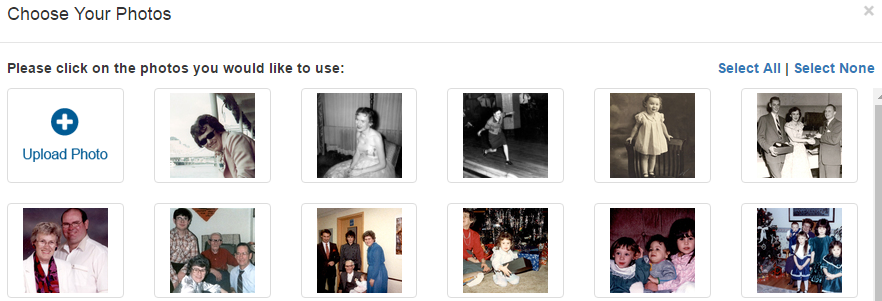
There will be the option to upload more photos should you need to. Simply click the Upload Photo button > click Add Files > find the photo on your computer > Open > click Upload File.
You can either select specific photos by clicking on each one once, or click “Select All” to add all of the photos.
Click Add Photos.
All your photos will appear within the Slides section.
Hover over a photo if you need to delete one.
You can click on a photo and drag it around should you wish to change the order of them.
Edit Photos
If you wish to edit your photo, there are many settings to choose from. Hover over your photo and click the pencil icon.
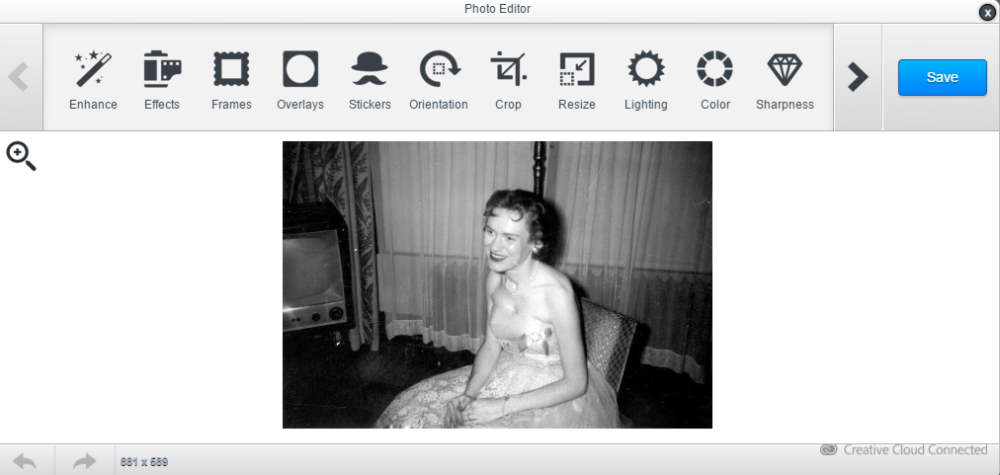
You will see many editing options across the top of the editor. Use the right arrow to see more options.
Once your changes have been made, click Save.
Add Video Slides
There are a couple different options for video.
1. Click the Add Video button where you can choose from a library of videos. Click on a video to preview it. Once you have selected a video to use, click Add Video.
2. Click the Add Video button where you can upload your own video. Click Upload Stock Video > click Add Files> Find the video file on your computer > Open > click Start Upload.
Add a Text Slide
This allows you to add a slide with text on it. It does not add the text to a photo itself.
Click on a photo then click Add Text.
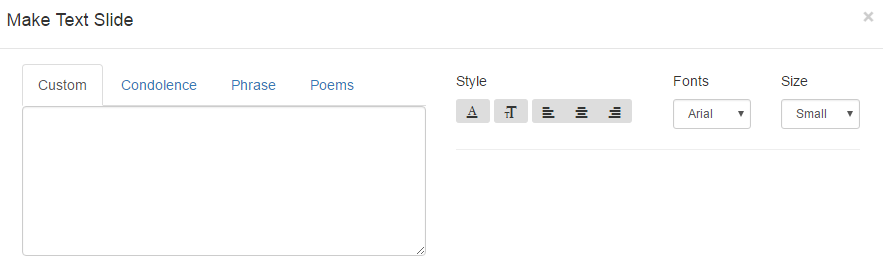
There are a few options for adding text:
- Custom: type in wording of your choice.
- Condolence: choose from a list of condolences posted in the Book of Memories.
- Phrase: choose from a list of phrases.
- Poems: choose from a list of poems.
 When your text is selected it will appear on the right side.
There will be editing options for your text selected:
- A icon: allows you to choose the background color.
- T icon: allows you to choose the text color.
- You have the option to left align, center align, or right align.
- Fonts drop down: allows you to choose a font style.
- Size drop down: allows you to choose a font size.
Once you have all text editing done and your preview looks good, click Add Slide.
The slide will appear with the photos. Click on it to drag it to where you want it to play in the video. If you wish to edit your slide, hover over it and click the pencil icon.
Add a Chapter Slide
This is basically the same as adding a text slide, however you can add borders/background images.
Click Add Chapter.
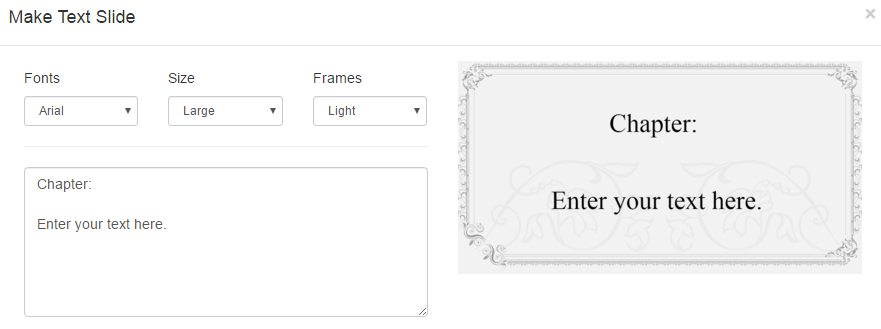
Enter your text in the text box. When you click off the box, your preview will show on the right.
Use the Fonts drop down to choose a font style.
Use the Size drop down to choose a font size.
Use the Frames drop down to choose a frame for your chapter.
When done, click Add Slide.
The slide will appear with the photos. Click on it to drag it to where you want it to play in the video. If you wish to edit your slide, hover over it and click the pencil icon.
Finish & Preview Your Video
When you are done editing your video, click the Finish & Preview button.
You will need to confirm your video:
- If you wish to include the video link in the Book of Memories, check the box.
- If you wish to display birth and death dates in the video. check the box.
- If you wish to disable the funeral home name in the video, check the box.
The available balance and cost of video will appear on the right. Click Pay with Credits.
Click Create Video.
Your video will start rendering. You will be taken to your projects section where you will see the download in progress.
When your video is done rendering you will receive an alert. You will then have access to edit your video, delete your video, download a MP3 file (to play on screen), and download an ISO file (used for DVD’s).
Burn File to DVD
There are many options available to burn DVDs; some are free while others are available for download at a range of costs. We suggest that you take a look at the ratings and how each works to determine which program will work best for you. Of the various free options available, we can recommend CD-Burner-XP.
h3 Printing DVD Case or label
“Once your DVD is complete it’s now time to print the Case and Label. Please refer to our Stationery section.
Need more help with this?
Don’t hesitate to contact us here.