We have a new and improved way to sell products on your website. If interested in adding this to your website, please contact your Success Coach before getting started.
Choose a Payment Processing Company
To get started you need to set up an account with a payment processing company. We have three options for you to choose from:
- PayPal – see information below.
- InternetSecure – contact your Success Coach to help you get started.
- Authorize.net – contact your Success Coach to help you get started.
PayPal
- Create a PayPal for business account.
- Navigate to Profile > Profile & Settings.
- Click My Selling Tools.
- Click Update for API access.
- Click Request API Credentials.
- You will need to verify your account.
- There are 3 pieces of information you will need to save:
- Username
- Password
- Signature
Add Products to Your System
You will need to make sure you have all of the products added into your product database. For more information on how to add, click here.
Define the Store Settings
Navigate to System Settings > Store.
Plan Information
This section can be edited as far as the store name, tax rate, and notification email addresses (click the help icons for more information).
Once the store is ready to go live, it’s important to click on the ‘Is Live’ checkbox.
You do not need to use the drop down for Template/Theme. Your project manager will set this up for you.
Use the drop down to select the payment processing company and enter the rest of the merchant information. This will be found within your payment processing company’s login.
Click on ‘Save’ at top right when changes have been made.
Categories
This section outlines the order of your store’s various categories.
Click on ‘Add’ at top right to create a new category. Enter a category name. Click Save. Follow these same steps until all categories are entered.
You will also need to add sub-categories. Click on ‘Add’ at top right. Enter a sub-category name. Use the drop down to select the category this sub-category belongs to. Click Save. Follow these same steps until all sub-categories are entered.
When adding categories and sub-categories you will notice blue arrows beside the category list. These are used to reorder your categories. Click a category name from the list and use the arrows. Click Save when done.
At any time you can edit a current category or sub-category by clicking the pencil icon. The ‘X’ allows you to delete.
Policies
Enter all policies that apply to your store.
Click Save when done.
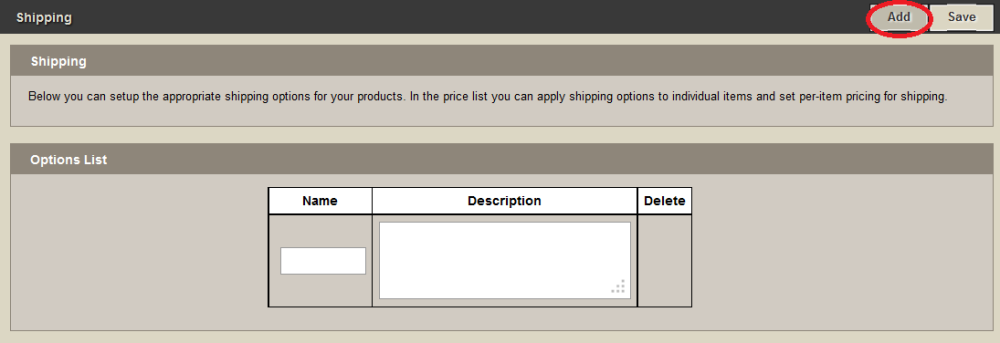
Shipping
If you have a standard shipping rate you can check the box under Shipping Settings.
If you have many shipping options:
- Click Add at top right to add a shipping option.
- Enter a name. Example: Local Shipping, or Within 24 Hours.
- Enter a description.
- Click Save.
All your shipping options will appear on screen. Should you need to delete one, you will see a Delete button beside each.
Item List
You will want to click through each category and add the items you wish to see in your store.
Click a category. You will notice your products have a red/pink background.
Enter a retail price.
By checking the box for In Store, will place this product in the store.
Choose the category for this product.
Click the Edit button for shipping. Check which shipping applies to this product and enter your pricing. Click Save.
Once set up correctly, the background color will change to green.
Product Relationships
This allows you to set up similar or recommended products for the consumer.
Use the Store Categories drop down to select a category.
Use the Items drop down to select your product.
A preview of the product will be shown below.
Use the Product Categories drop down to select the category in which you will find your similar or recommended product in.
Use the Product Items drop down to select the similar or recommended product.
Click Add.
Follow the same steps until you have all your product relationships set up.
Use the blue arrows to change the order of the products. The ‘X’ will allow you to delete an item.
Online Store
Based on the settings in your store, when complete, the online store will be automatically created for you.
Need more help with this?
Don’t hesitate to contact us here.

