
Step 4: Misc Configuration (Optional)
This Miscellaneous Configuration set-up is only needed for a small percentage of clients.
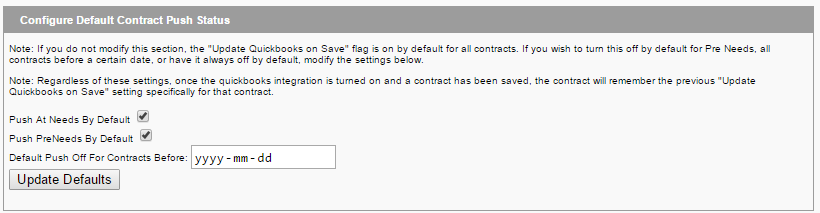
Configure Default Contract Push Status
As a default in your system, both At-Needs and Pre-Needs contacts will all have the “Update Quickbooks on Save” enabled on the contract screen for a record. This will automatically queue any contract, customer and payments to the contract to Quickbooks once saved. You may adjust your default setting to automatically have the “Update Quickbooks on Save” disabled for At-Needs and/or Pre-Needs. This will allow you to manual check off the “Update Quickbooks on Save” for particular contracts to be queued for Quickbooks.
You may also set a default date for Pre-Need and At-Need contracts to start queuing items to push to Quickbooks only after that day. This date may be the official date that you are configuring your Quickbooks Integration and have reconciled your account. It is only optional to enter a date.
Please note the following when setting up a default contract push date:
Note: If you do not modify this section, the “Update Quickbooks on Save” flag is on by default for all contracts. If you wish to turn this off by default for Pre Needs, all contracts before a certain date, or have it always off by default, modify the settings below.
Note: Regardless of these settings, once the quickbooks integration is turned on and a contract has been saved, the contract will remember the previous “Update Quickbooks on Save” setting specifically for that contract.
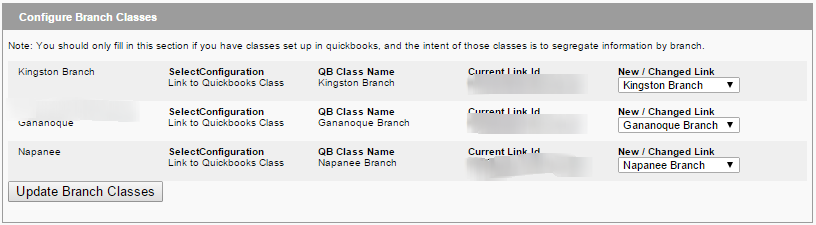
Configure Branch Classes
If you have configured class accounts in your QuickBooks system, you will need to set up the Miscellaneous Configuration.If you have not done so in previous steps (and if there are no branch/classes showing in the “Configure Branch Classes” section), click the “Update Class Query” button at the bottom of the page, then run the Web Connector.
Your list of branches/classes from QuickBooks will populate to the Quickbooks Classes section of the screen.


In the top section, Configure Branch Classes, in the New/Changed Link box, select the branch/class that you’d like to set up to link to, then click “Update Branch Classes” link.
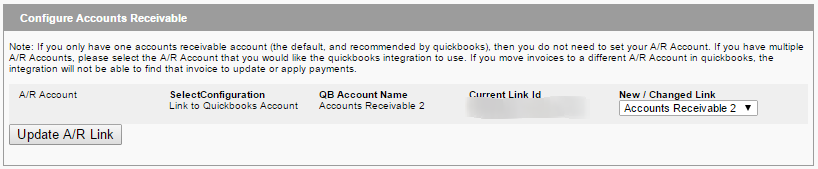
Configure Accounts Receivable
If you run multiple Accounts Receivable accounts from your QuickBooks, you will need to set up the Miscellaneous Configuration.
If you have not done so in previous steps (and if there are no accounts showing in the “Quickbooks A/R Accounts section”), click the “Update Account Query” button, then run the Web Connector.
Your list of Accounts Receivable accounts from QuickBooks will populate to the Quickbooks A/R Accounts section of the screen.


In the top section, Configure Accounts Receivable, in the New/Changed Link box, select the A/R account that you’d like to set up to link to, then click “Update A/R” link.
Configure Contract as Grand Total
If you wish your contracts to push to quickbooks as a single line item (or possibly two if some items are taxed and some are not), then check the box in this section to have it linked up.

Need more help with this?
Don’t hesitate to contact us here.